25 Easy and Stylish Simple Mehndi Designs in 2024
Introduction
Mehndi, also known as henna, is a beautiful art form that has adorned the hands and feet of people for centuries. Originating from ancient cultures, mehndi holds a special place in traditional ceremonies, festivals, and weddings. But you don't need a special occasion to decorate your hands with these lovely patterns. Simple mehndi designs can add a touch of elegance to your everyday look without requiring professional expertise.
In this comprehensive guide, we've compiled 25 easy and stylish simple mehndi designs for both the front and back of your hands. Whether you're a beginner or just looking for quick designs to try out, these patterns are perfect for you. Plus, we'll provide image prompts to help you visualize and create each design. So, let's dive into the world of mehndi and get your hands looking beautiful!
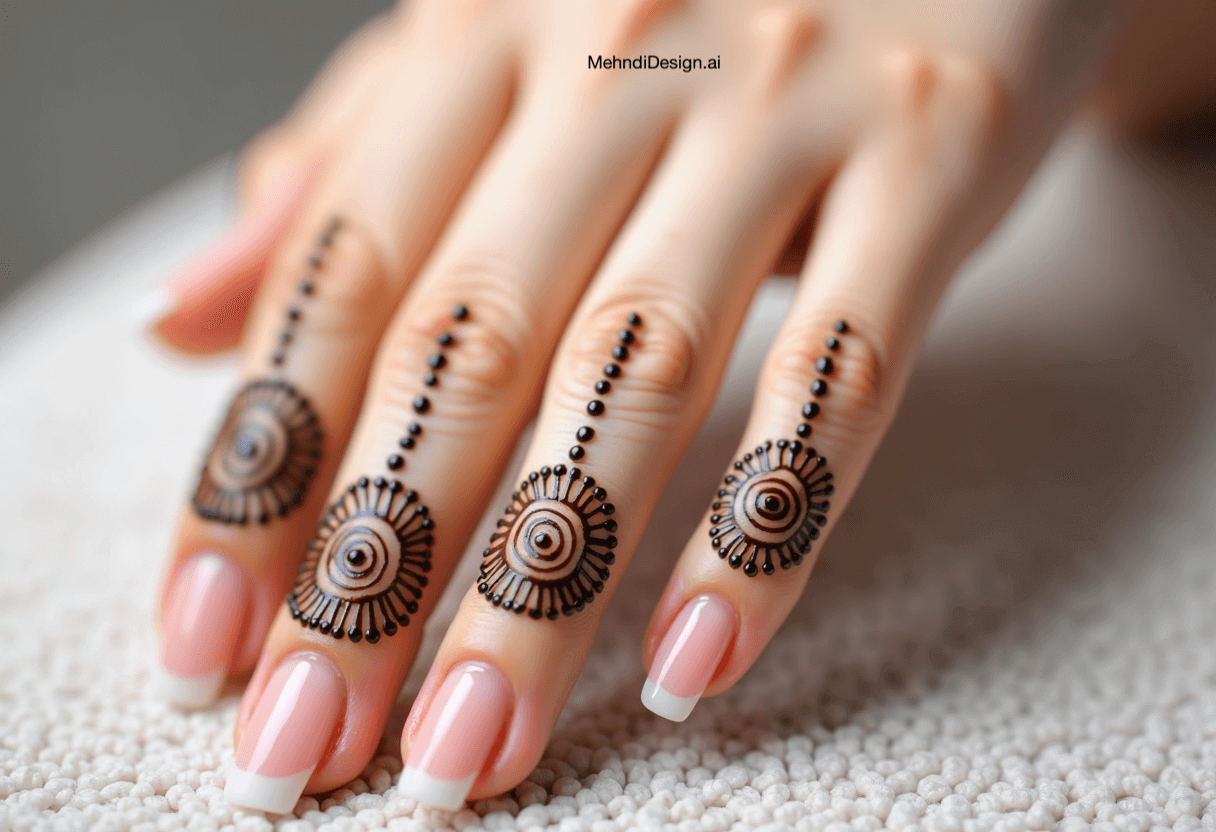
1. Floral Finger Tips
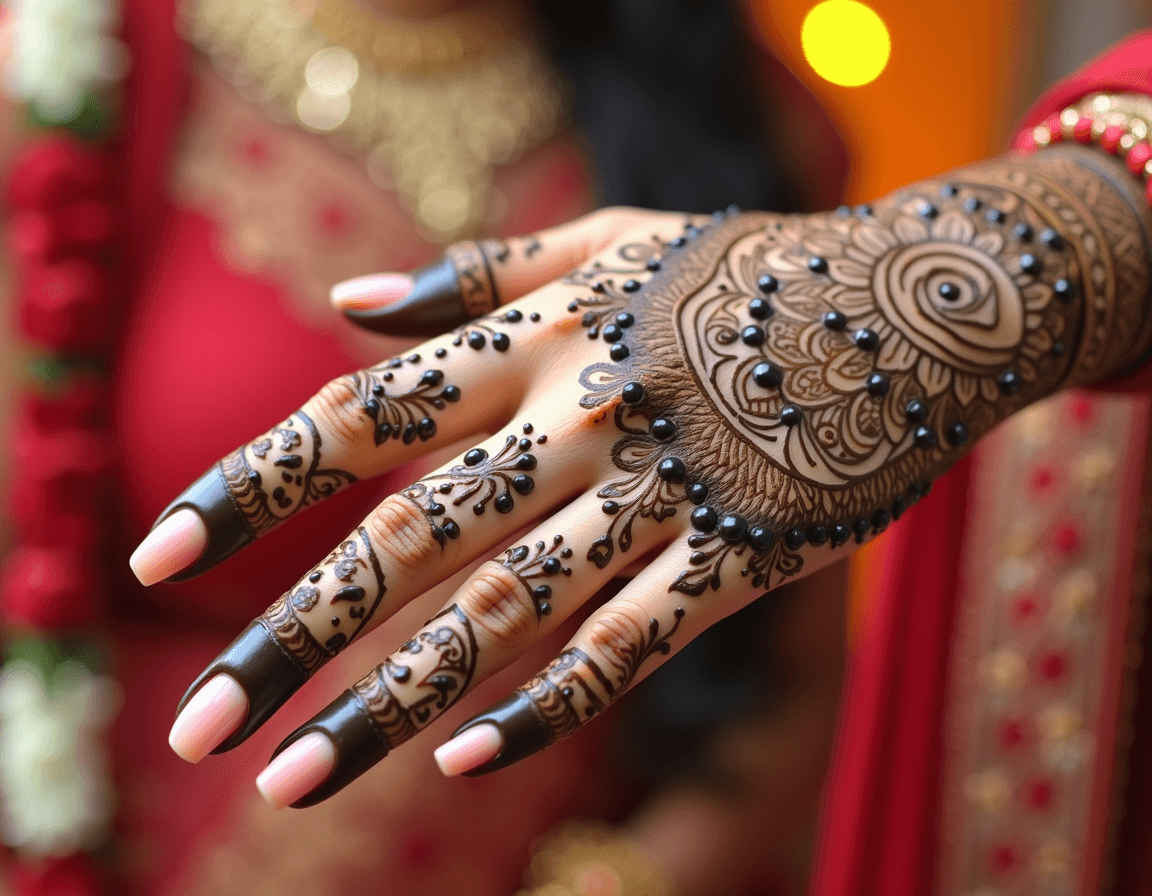
Flowers are timeless in mehndi designs. This pattern focuses on drawing small, simple flower motifs on each fingertip. It's an easy design that adds a delicate touch to your hands without being overwhelming.
How to Draw:
- Start by drawing a small circle at the tip of each finger.
- Add five or six petals around the circle to form a simple flower.
- You can add tiny dots around the flowers for extra detail.
Tips:
- Keep the lines thin for a more elegant look.
- You can vary the flower sizes for each finger for added interest.
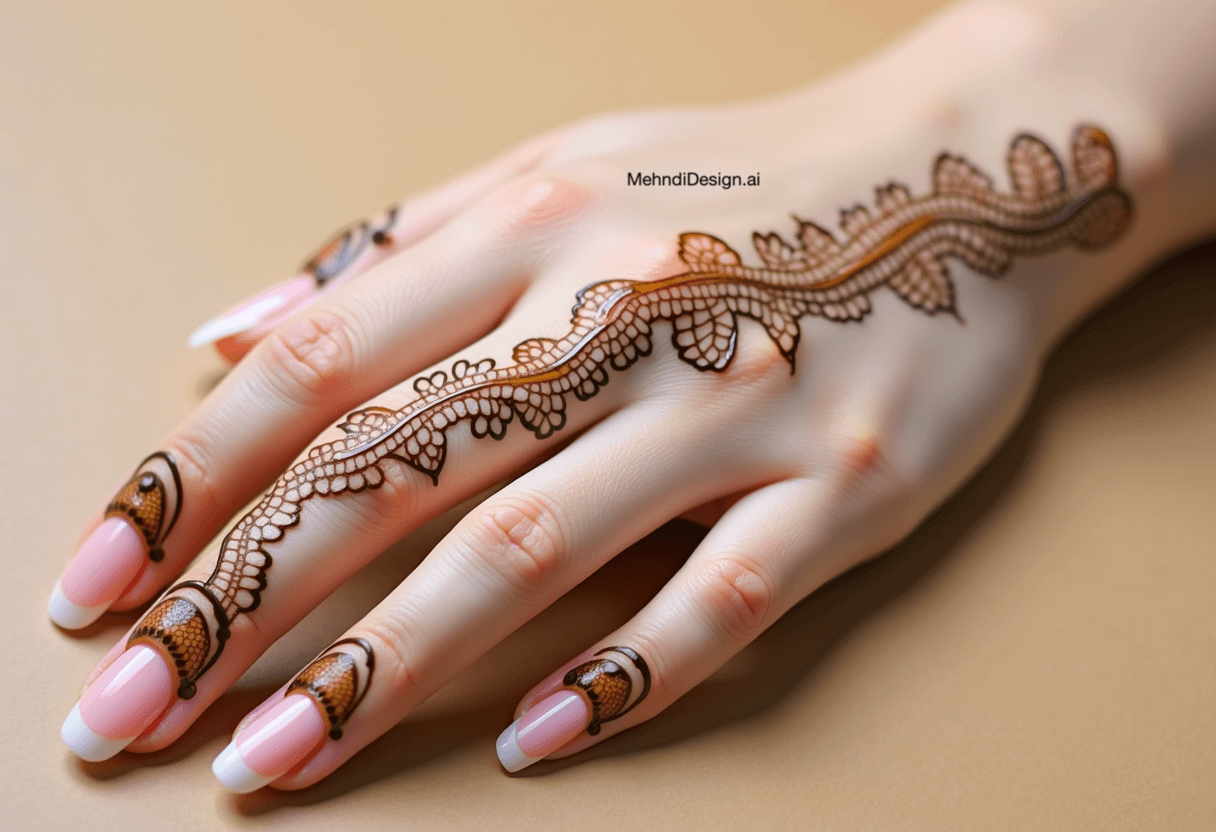
2. Minimalist Vine Trails
Vines symbolize growth and harmony. This design features thin vine patterns starting from the wrist and winding gracefully around the fingers, giving your hand an elongated and elegant appearance.
How to Draw:
- Draw a thin, wavy line starting from your wrist towards your index finger.
- Along the line, add tiny leaves or small flowers at intervals.
- You can extend the vine onto each finger, following its natural curve.
Tips:
- Keep the vines light and airy to maintain the minimalist feel.
- Use consistent leaf shapes for a cohesive look.
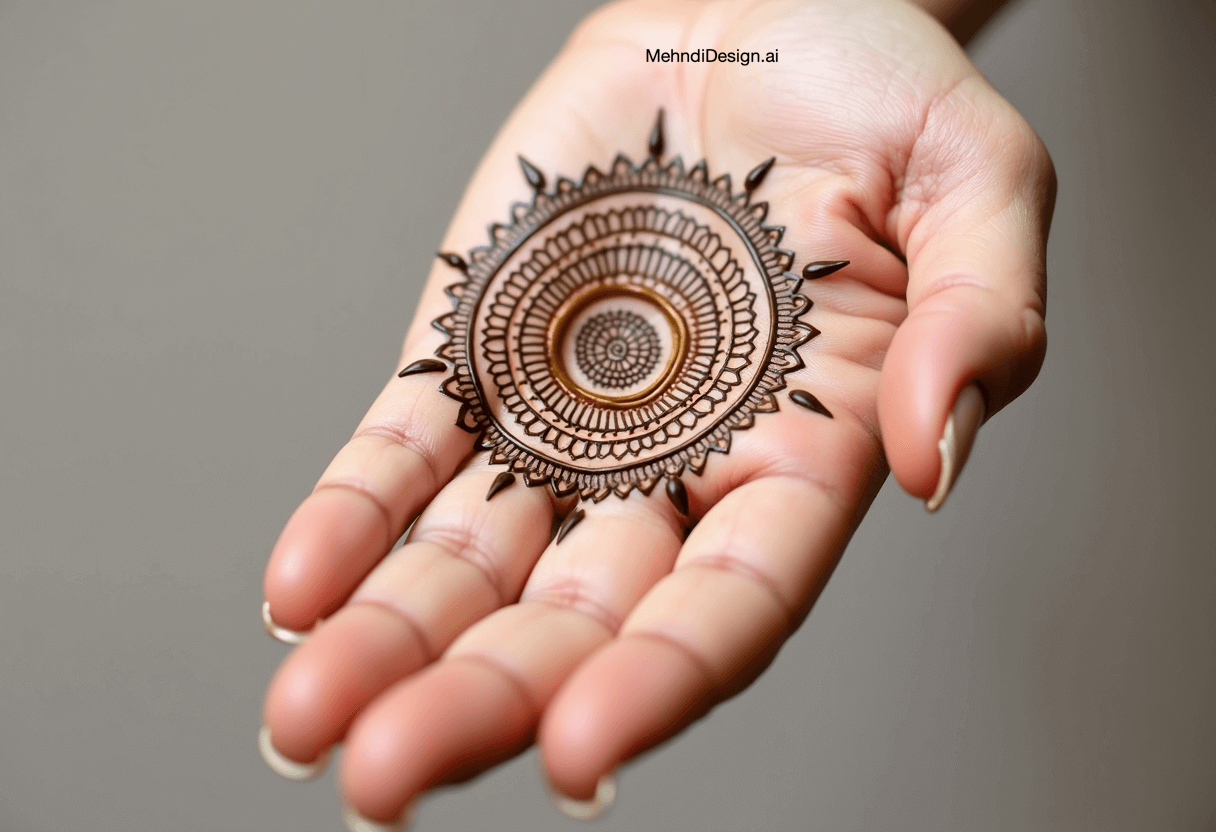
3. Simple Mandala
Mandala designs represent the universe and are a staple in traditional mehndi. Placing a small mandala in the center of your palm is both symbolic and visually appealing. It is a simple front hand mehndi design that you can go for.
How to Draw:
- Start with a small circle in the center of your palm.
- Draw concentric circles around it, adding patterns like petals, dots, or lines in each layer.
- Ensure symmetry for the best effect.
Tips:
- Use simple shapes if you're a beginner.
- You can practice on paper first to get the proportions right.
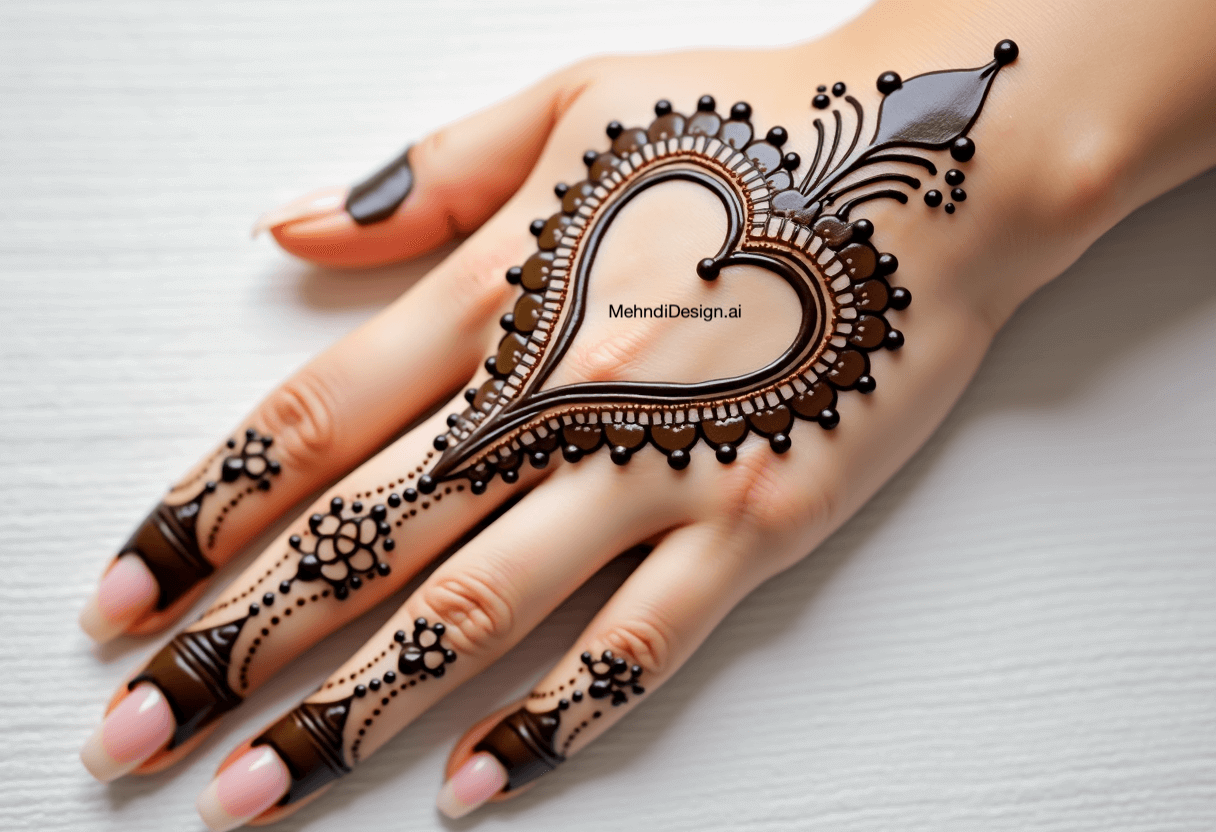
4. Heart Pattern
A heart design is simple yet expressive. Drawing a heart on the back of your hand can symbolize love and affection, making it perfect for romantic occasions or just for fun.
How to Draw:
- Draw a medium-sized heart in the center of the back of your hand.
- You can fill it with dots, lines, or keep it empty for a minimalist look.
- Add small hearts around it or along your fingers if desired.
Tips:
- Keep the lines smooth to make the heart shape clear.
- Combine with other simple elements like stars or dots for added flair.
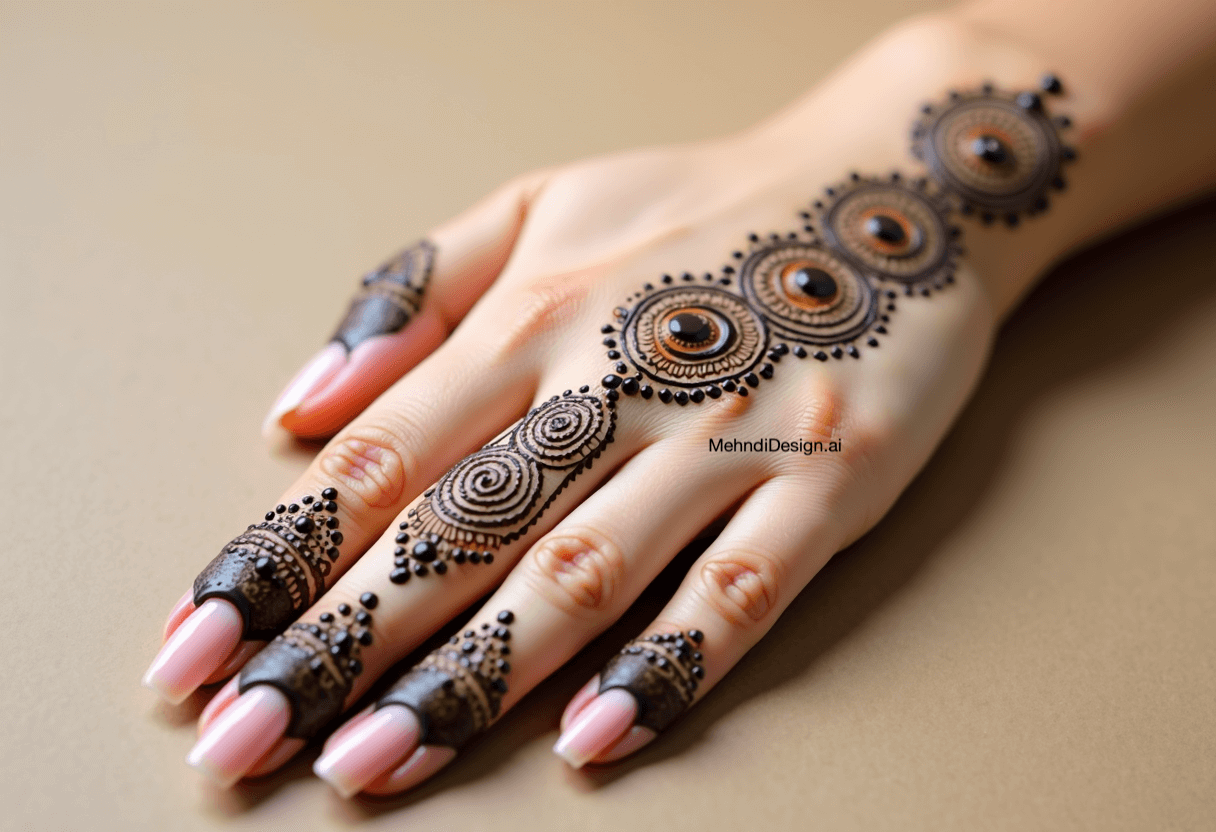
5. Dot Work Magic
Dot work is one of the simplest techniques in mehndi art. By using dots of varying sizes, you can create intricate-looking designs without complex patterns.
How to Draw:
- Decide on a basic shape or pattern, like a flower or a geometric shape.
- Use dots to outline the shape and fill it in.
- You can create lines, curves, or fill spaces entirely with dots.
Tips:
- Vary the spacing between dots to create different textures.
- Use larger dots for outlines and smaller ones for filling.
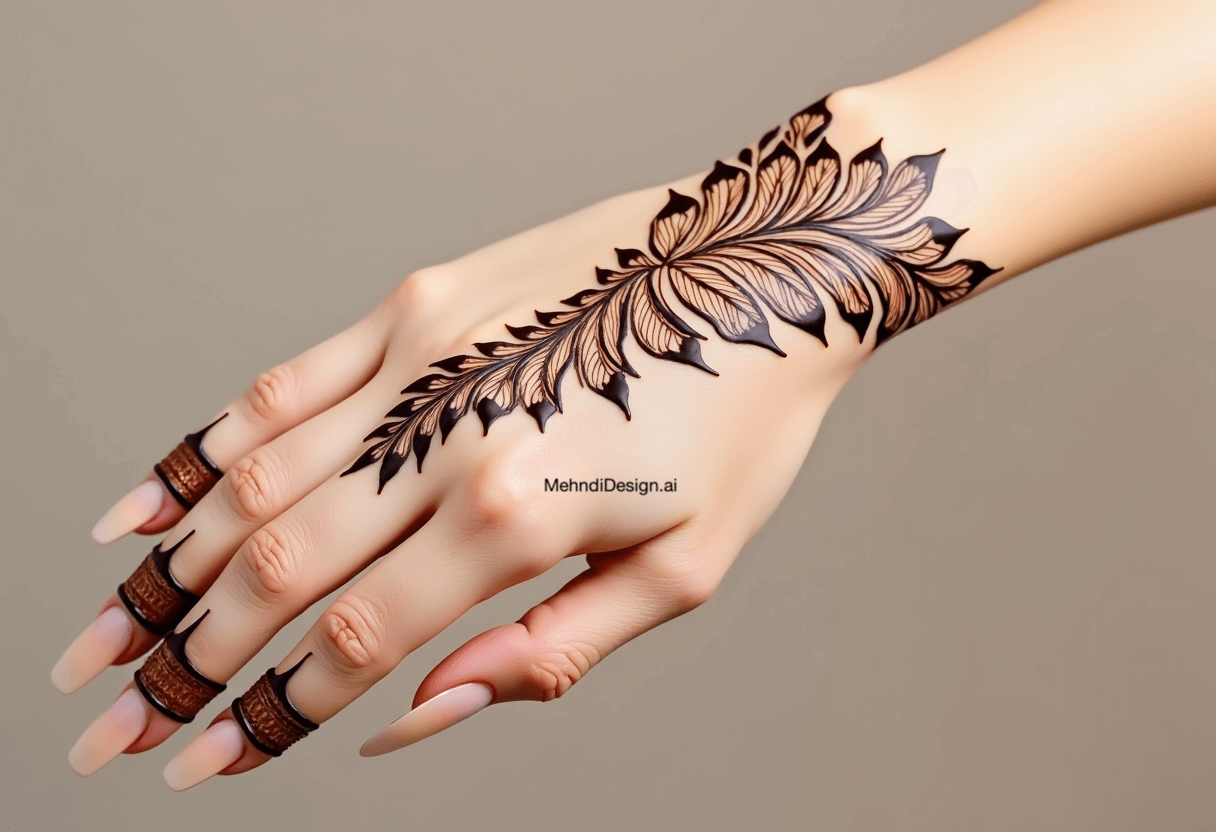
6. Leafy Bracelet
This design mimics a bracelet made of leaves around your wrist. It is one of the most stylish simple mehndi design and gives the illusion of wearing actual jewelry.
How to Draw:
- Draw a band around your wrist using two parallel lines.
- Between the lines, draw small leaves connected by a thin stem.
- Add details to the leaves with tiny veins.
Tips:
- Ensure the band fits comfortably around your wrist.
- You can extend the design onto your hand for a more elaborate look.
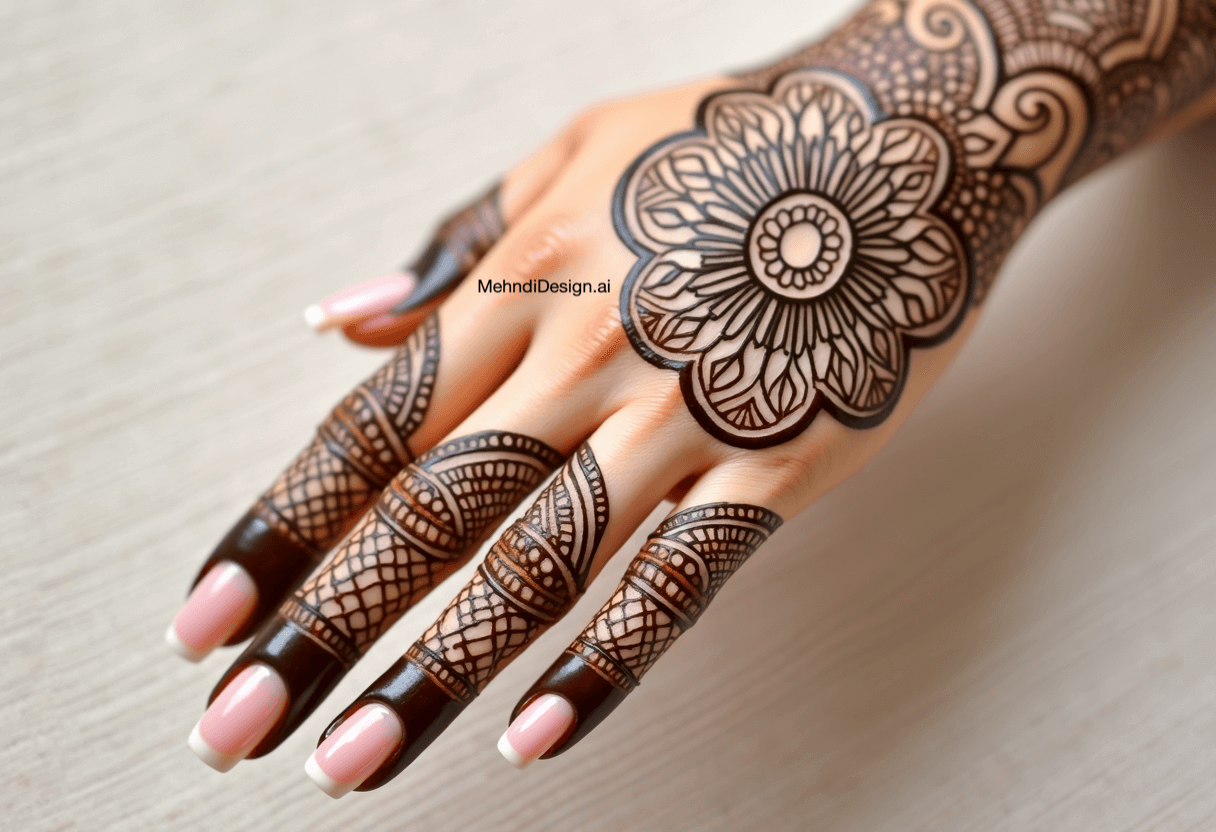
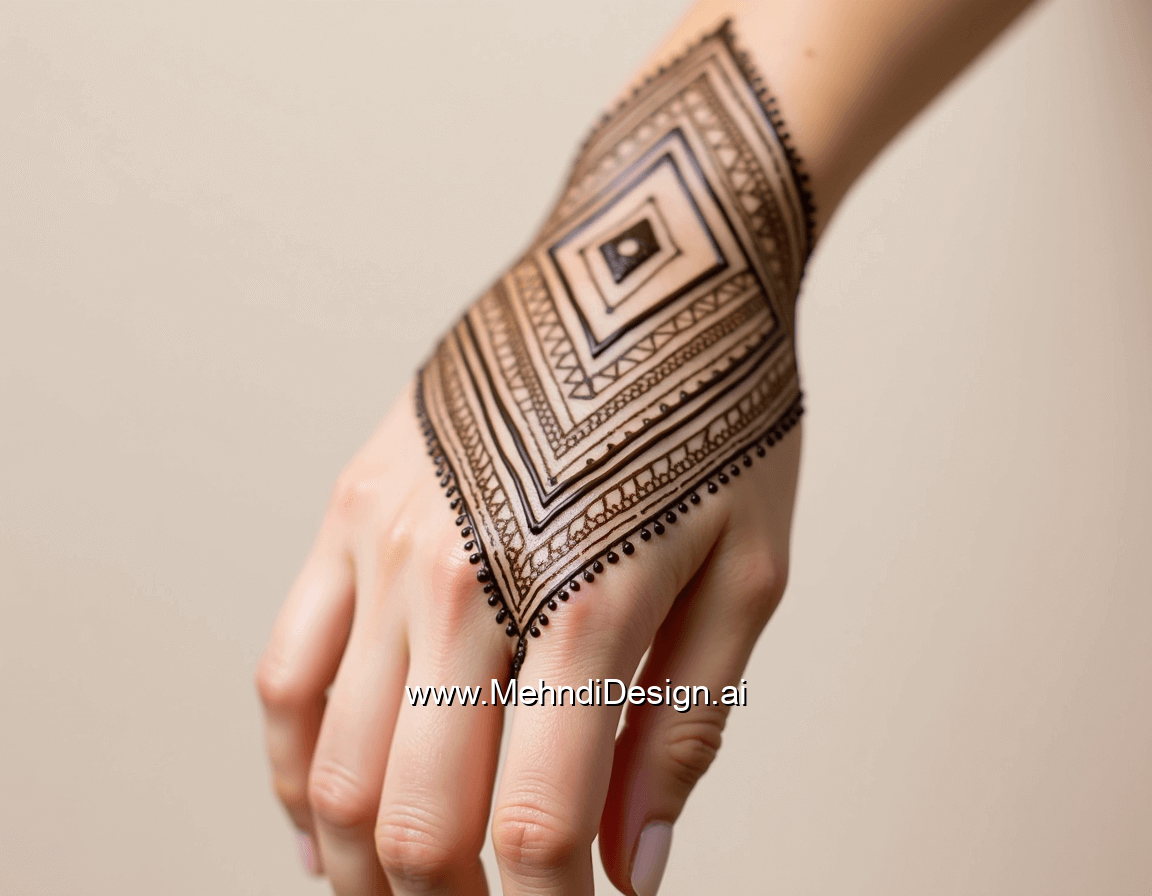
7. Geometric Shapes
Geometric patterns offer a modern twist to traditional mehndi designs. Simple shapes like triangles, squares, and diamonds can create a striking visual effect.
How to Draw:
- Choose a central point on your hand.
- Draw geometric shapes interconnected or layered over each other.
- Keep the lines clean and shapes well-defined.
Tips:
- Use a ruler or straight edge if necessary for precision.
- Combine different shapes for a more complex design.
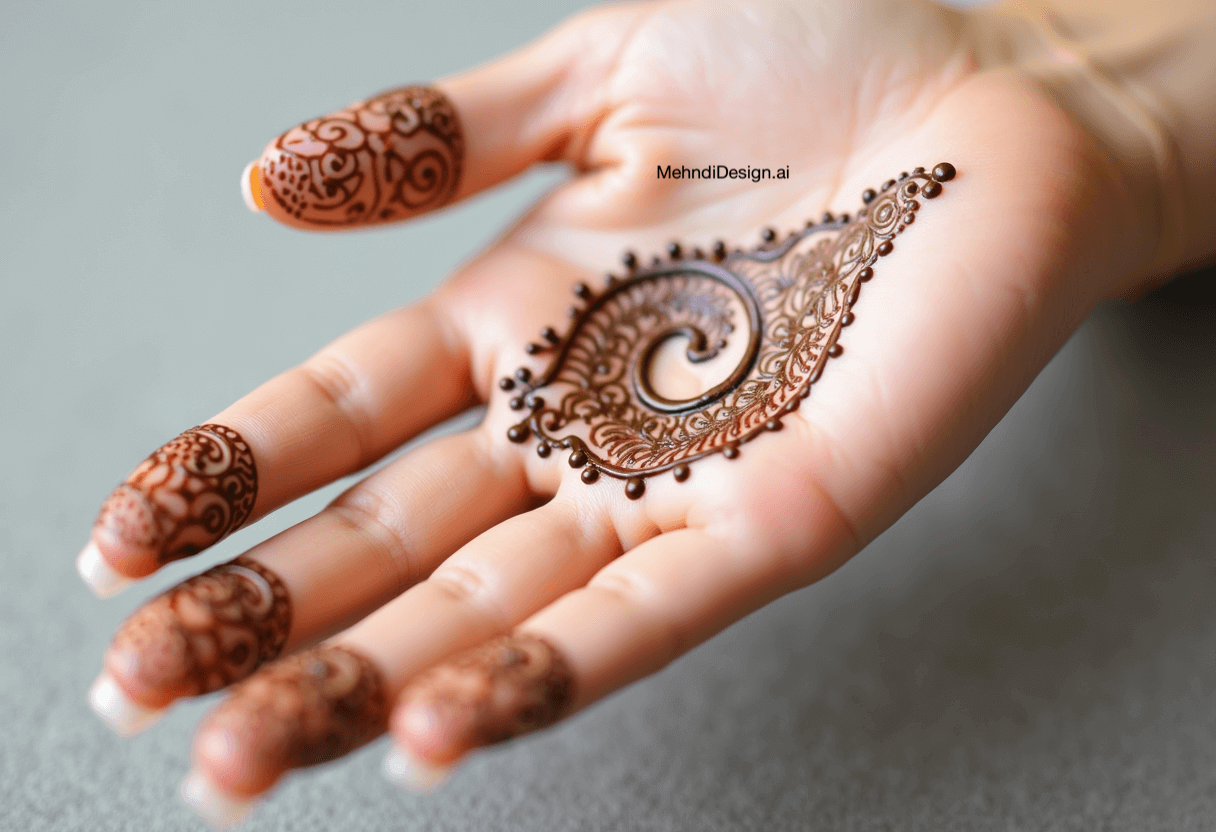
8. Paisley Simplicity
The paisley motif is a classic in mehndi designs. A single, simple paisley can be both elegant and easy to draw, making it suitable for beginners.
How to Draw:
- Start by drawing a teardrop shape with a curved end.
- Add a smaller teardrop inside to create the paisley effect.
- Decorate the inside with dots or small lines.
Tips:
- Practice the teardrop shape beforehand to get the curve right.
- You can add small paisleys around the main one for more detail.
9. Swirl Patterns
Swirls and curls add movement to your design and are forgiving for those new to mehndi art. They can fill up space beautifully without much effort.
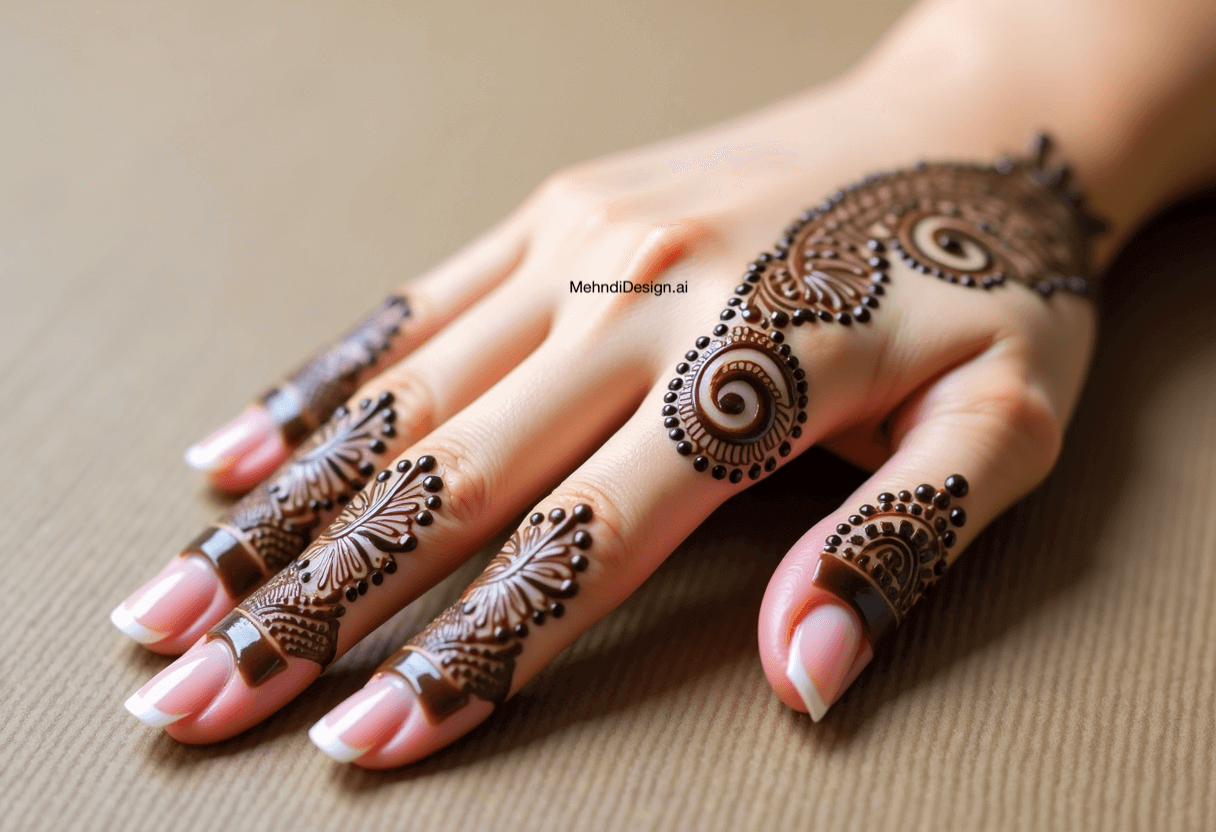
How to Draw:
- Start with a small spiral and gradually make it larger.
- Add additional swirls branching off from the main one.
- Fill empty spaces with tiny dots or small swirls.
Tips:
- Keep the swirls consistent in thickness.
- Use varying sizes of swirls for a dynamic look.
10. Finger Bands
Finger bands resemble rings or decorative bands and are perfect for those who prefer minimal designs. They accentuate your fingers elegantly.
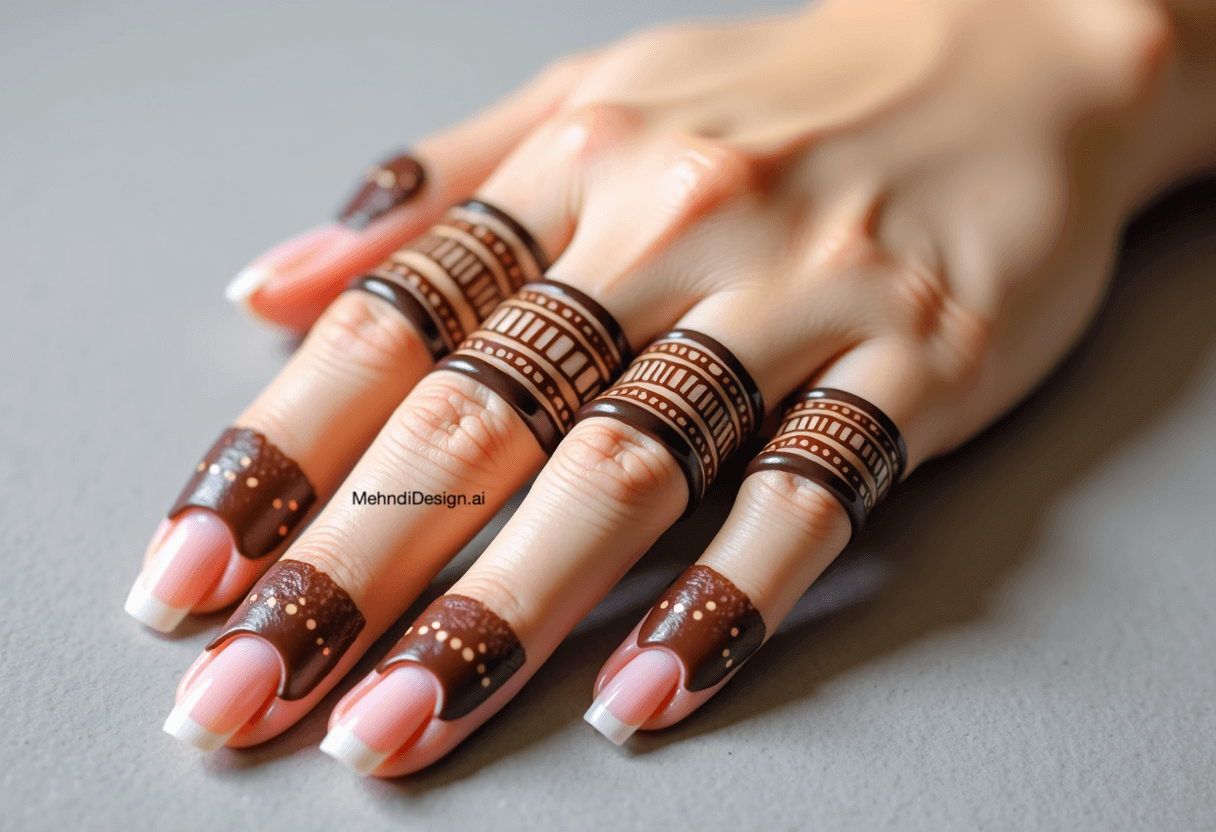
How to Draw:
- Draw horizontal lines across the fingers where you'd wear rings.
- Add simple patterns like dots, triangles, or small flowers between the lines.
- You can vary the number of bands on each finger.
Tips:
- Keep the designs small and neat.
- Avoid drawing too close to the nail bed.
11. Starry Night
Stars bring a whimsical and dreamy feel to your mehndi design. Scattering small stars across your hand can create a simple yet enchanting pattern.
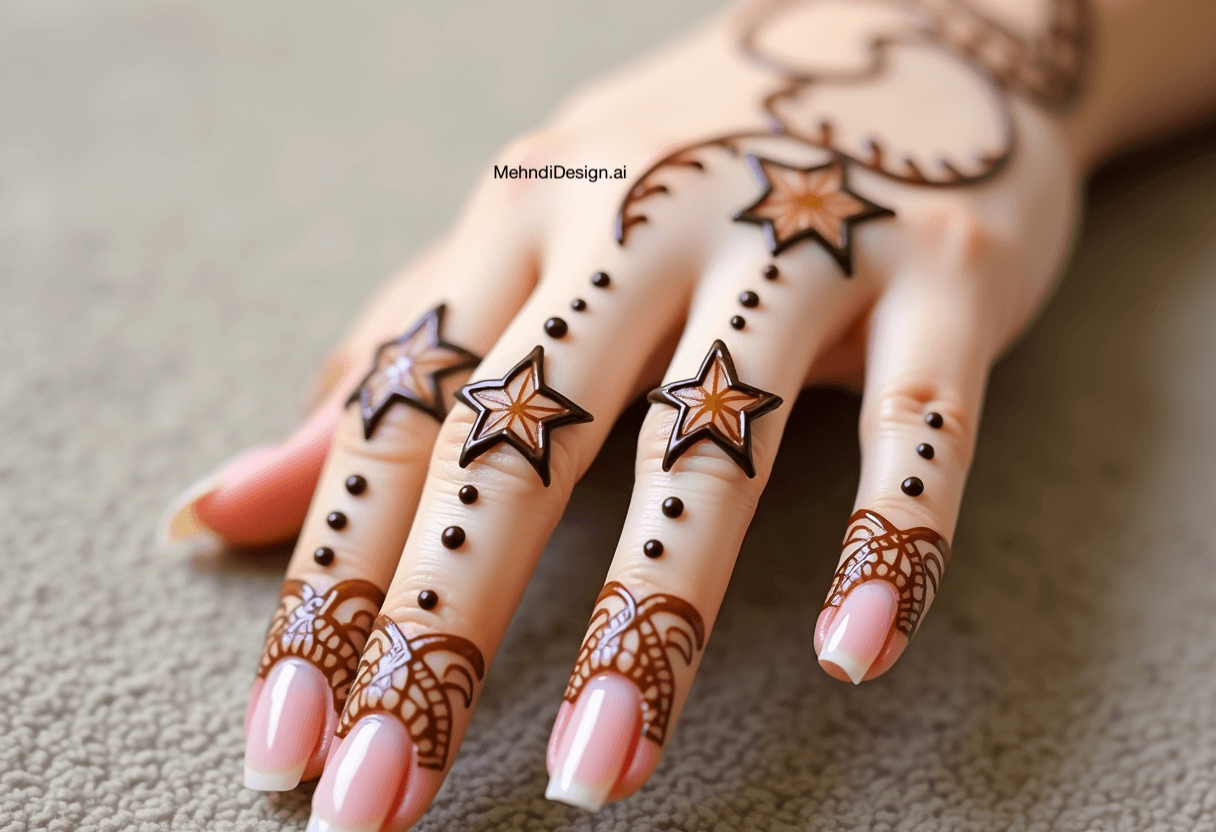
How to Draw:
- Draw small five-pointed stars randomly over your hand.
- Connect some stars with dotted lines for a constellation effect.
- Add tiny dots to represent smaller stars.
Tips:
- Vary the size of the stars for depth.
- Keep the design spread out to avoid clutter.
12. Simple Net Pattern
A net or mesh pattern looks intricate but is quite simple to create. It fills up space and adds texture to your design.
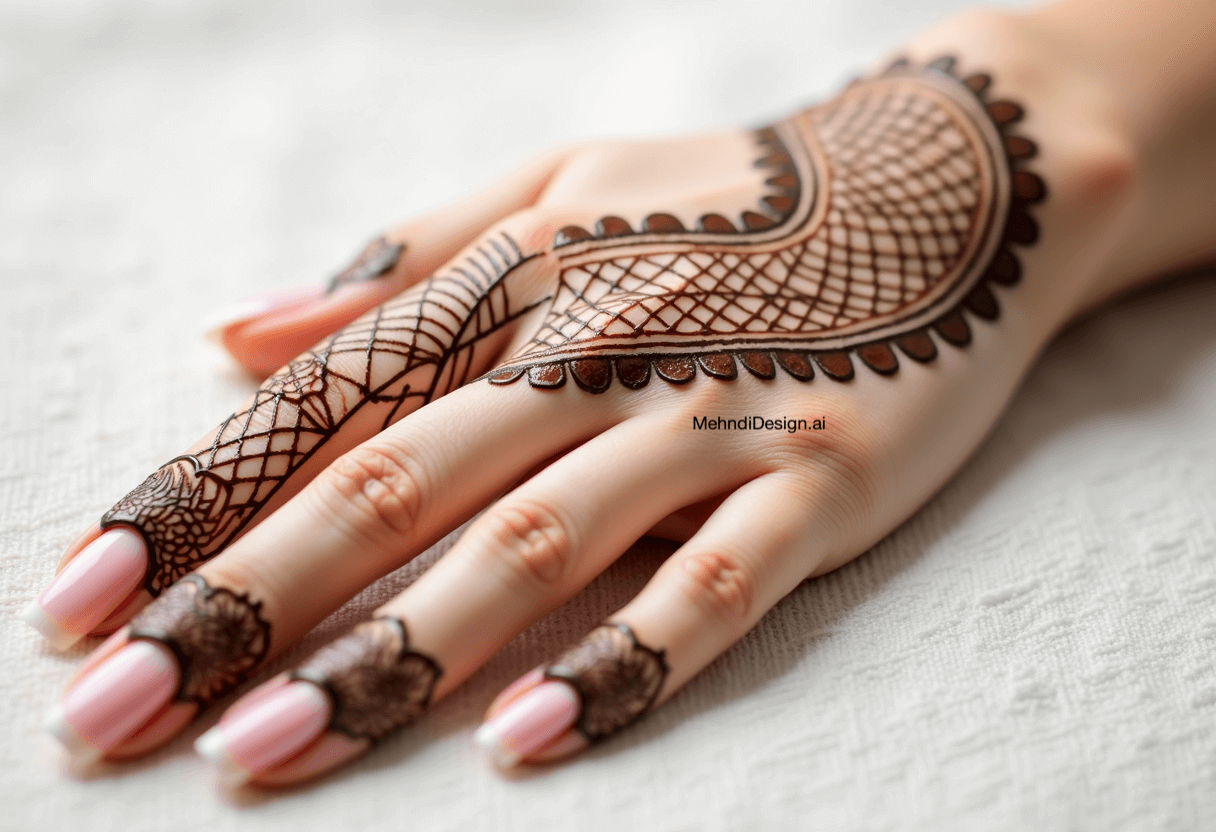
How to Draw:
- Draw diagonal lines across the area you want to cover.
- Cross them with another set of diagonal lines going the opposite way.
- At the intersections, you can add tiny dots or flowers.
Tips:
- Keep the spacing between lines consistent.
- Use thin lines for a delicate net appearance.
13. Floral Wrist Band
Similar to the leafy bracelet, this design focuses on flowers around the wrist. It's charming and brings focus to your wrist like a corsage.
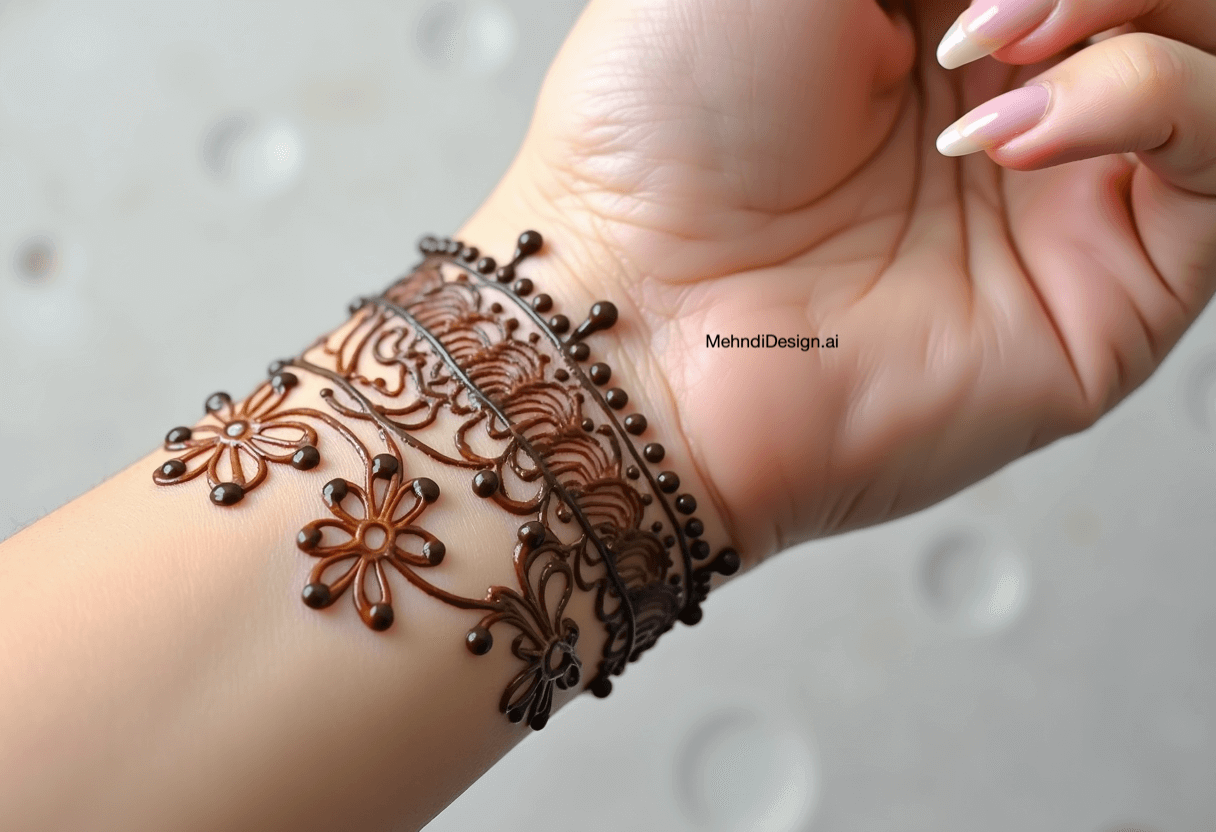
How to Draw:
- Draw a band around your wrist as the base.
- Add simple flower motifs connected by vines or stems along the band.
- Include leaves or buds for added detail.
Tips:
- Choose a favorite flower to personalize the design.
- Ensure the flowers are evenly spaced.
14. Cute Butterflies
Butterflies symbolize transformation and joy. Incorporating them into your mehndi adds a playful touch.
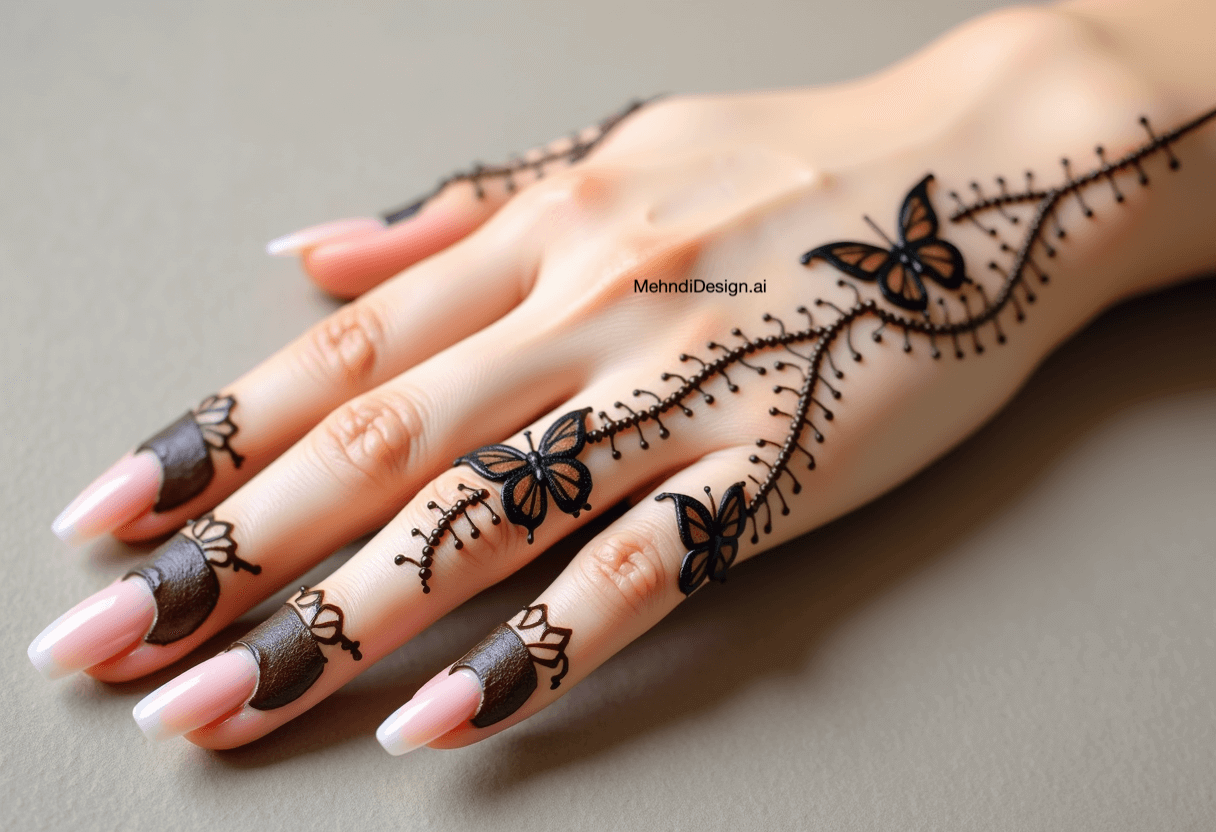
How to Draw:
- Draw a small circle for the head and an elongated shape for the body.
- Add two wings on each side with simple curves.
- Decorate the wings with dots or lines.
Tips:
- Keep the butterflies small to maintain simplicity.
- Place them along the sides of your hand or fingers.
15. Sun Motif
The sun is a symbol of life and energy. A simple sun design can be a bold centerpiece for your mehndi.
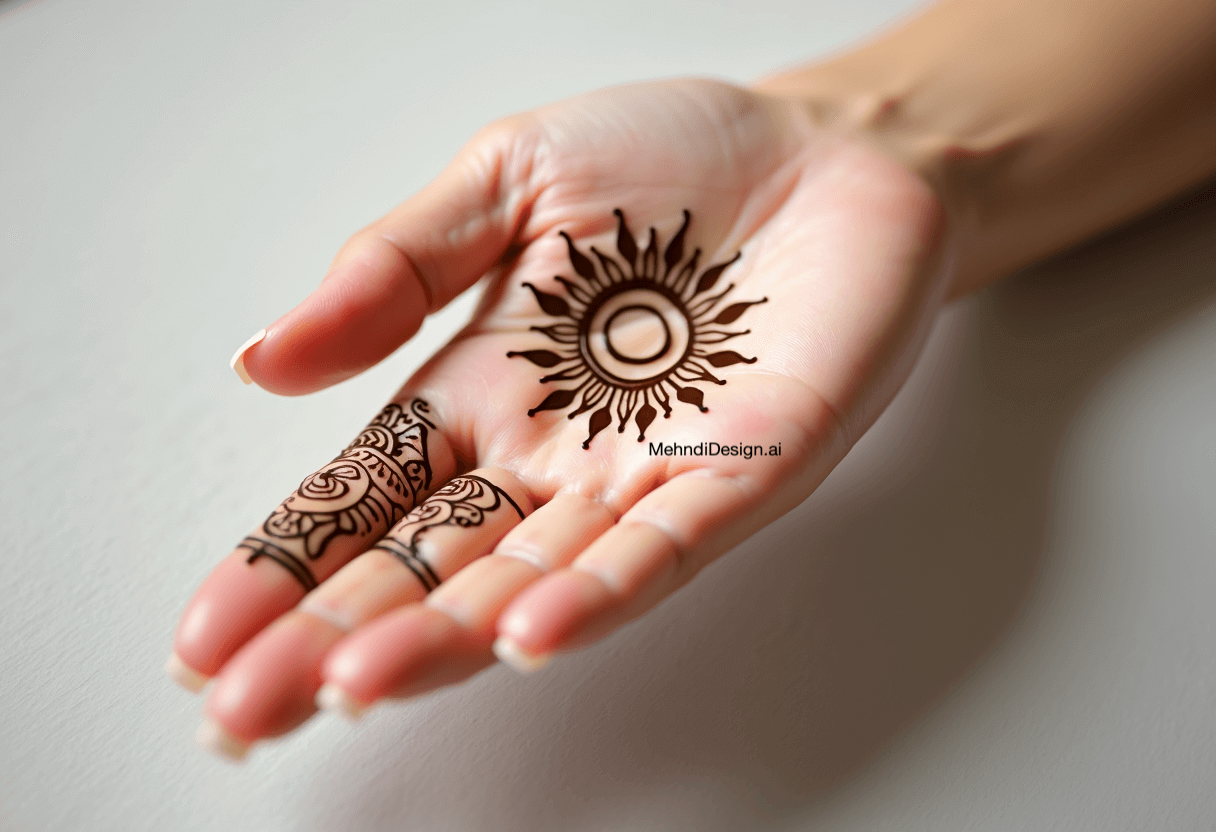
How to Draw:
- Draw a circle in the center of your palm.
- Add straight lines radiating outward to represent rays.
- You can alternate the length of the rays for a dynamic look.
Tips:
- Keep the rays evenly spaced around the circle.
- Add small dots between the rays for extra detail.
16. Simple Arabic Style
Arabic mehndi designs are known for their bold lines and floral patterns. A simplified version can be both easy to draw and visually striking.
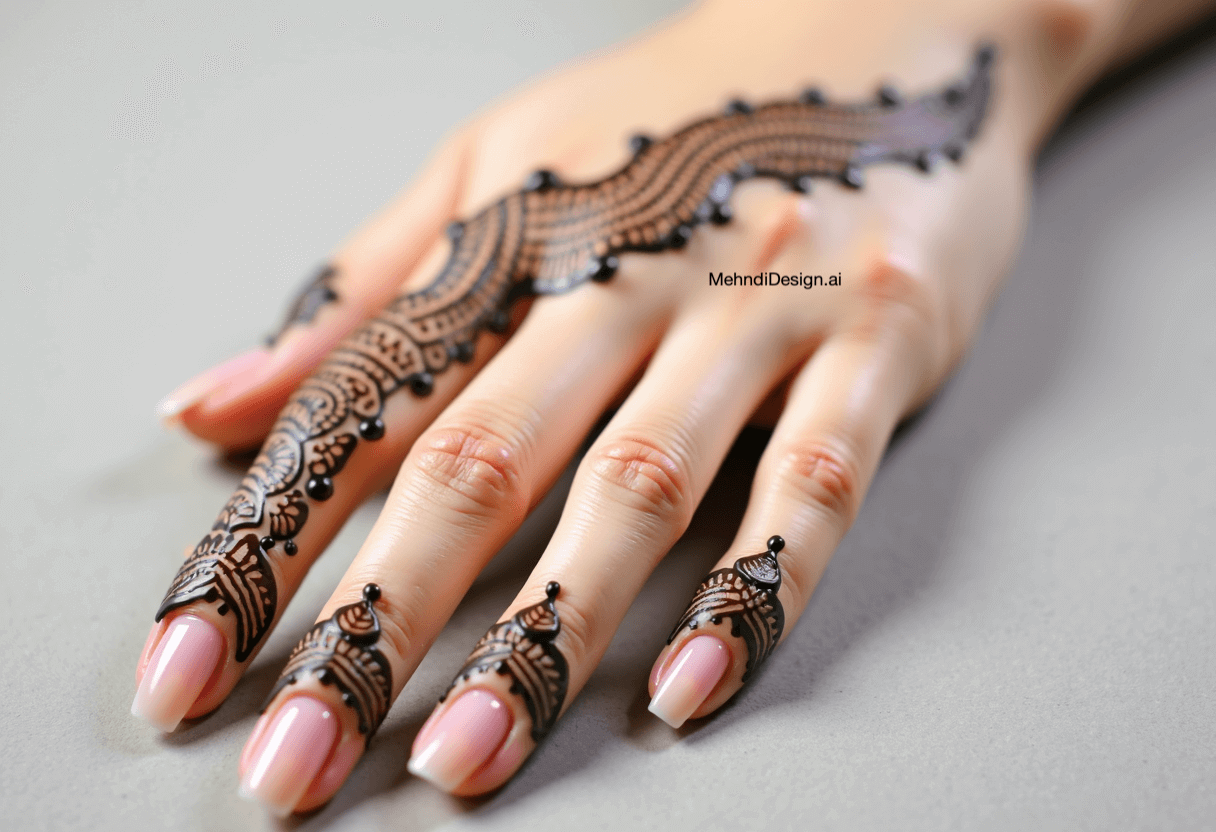
How to Draw:
- Start at the wrist with a large flower or paisley.
- Extend the design diagonally across the hand towards the index finger.
- Use bold lines and fill in with leaves and simple patterns.
Tips:
- Focus on flow and movement in the design.
- Leave some spaces unfilled for the traditional Arabic look.
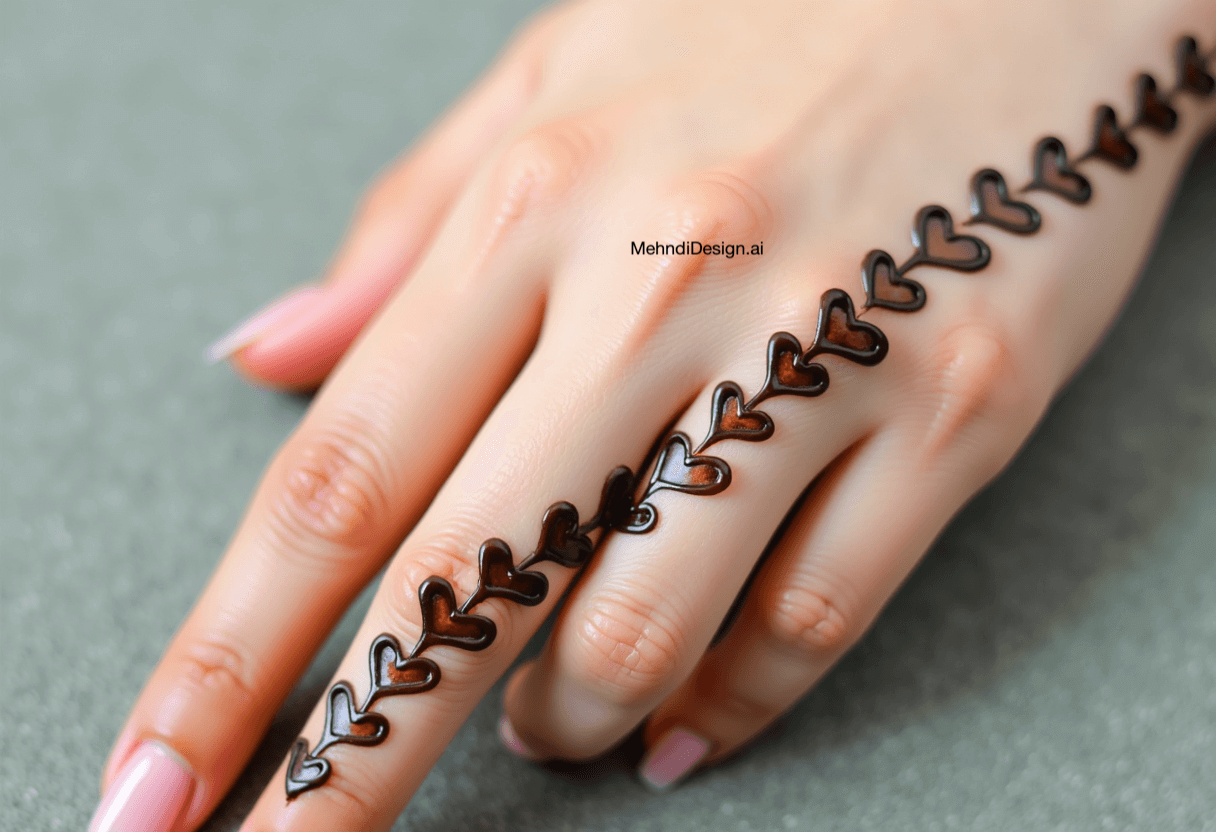
17. Tiny Hearts Trail
A trail of tiny hearts adds a romantic and cute element to your mehndi. It's simple and can be done quickly.
How to Draw:
- Start at your wrist or the base of your finger.
- Draw small hearts connected by a thin line or dots.
- Continue the trail along your hand or finger.
Tips:
- Keep the hearts uniform in size.
- You can alternate the direction of the hearts for variety.
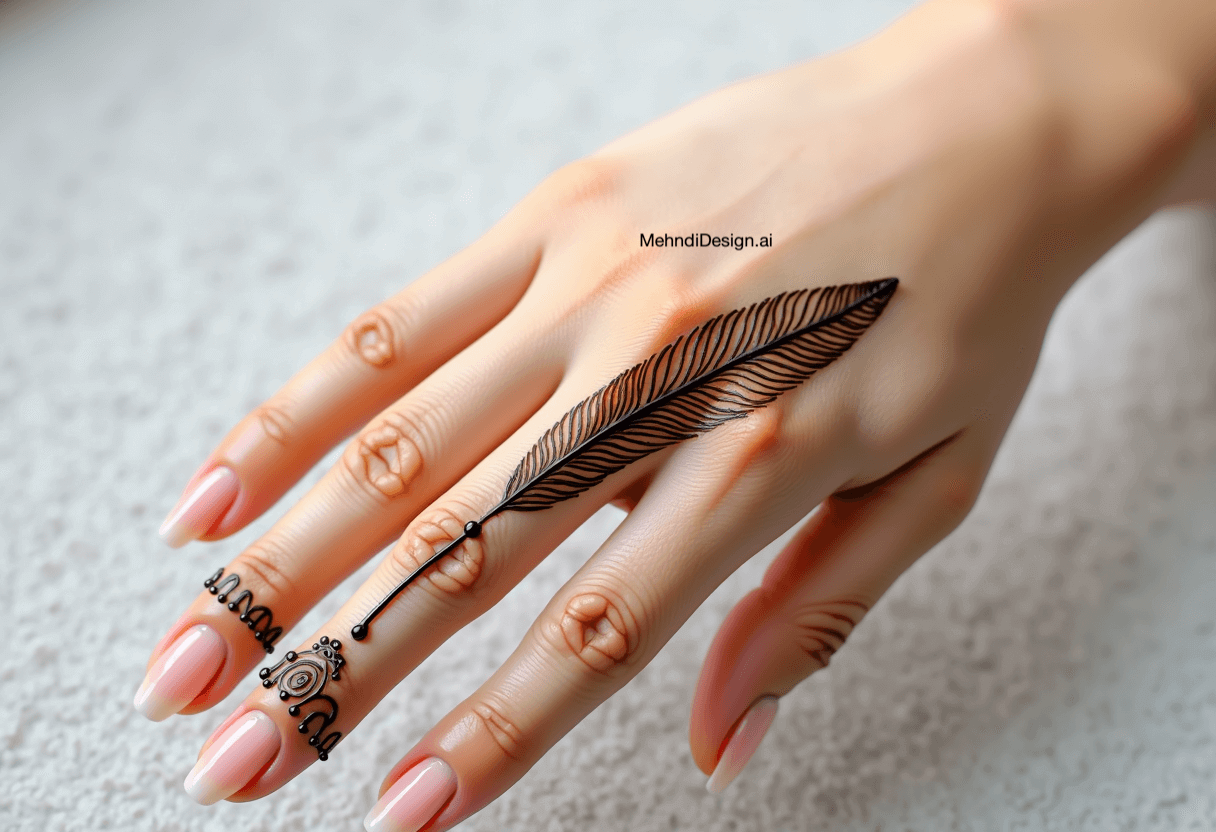
18. Feather Design
Feathers symbolize freedom and lightness. A single feather along the side of your hand is elegant and unique.
How to Draw:
- Draw a long, slightly curved line for the shaft of the feather.
- Add short, diagonal lines on both sides for the barbs.
- Make the base thicker to represent the quill.
Tips:
- Keep the lines light to mimic the softness of a feather.
- You can add small details like dots or tiny swirls.
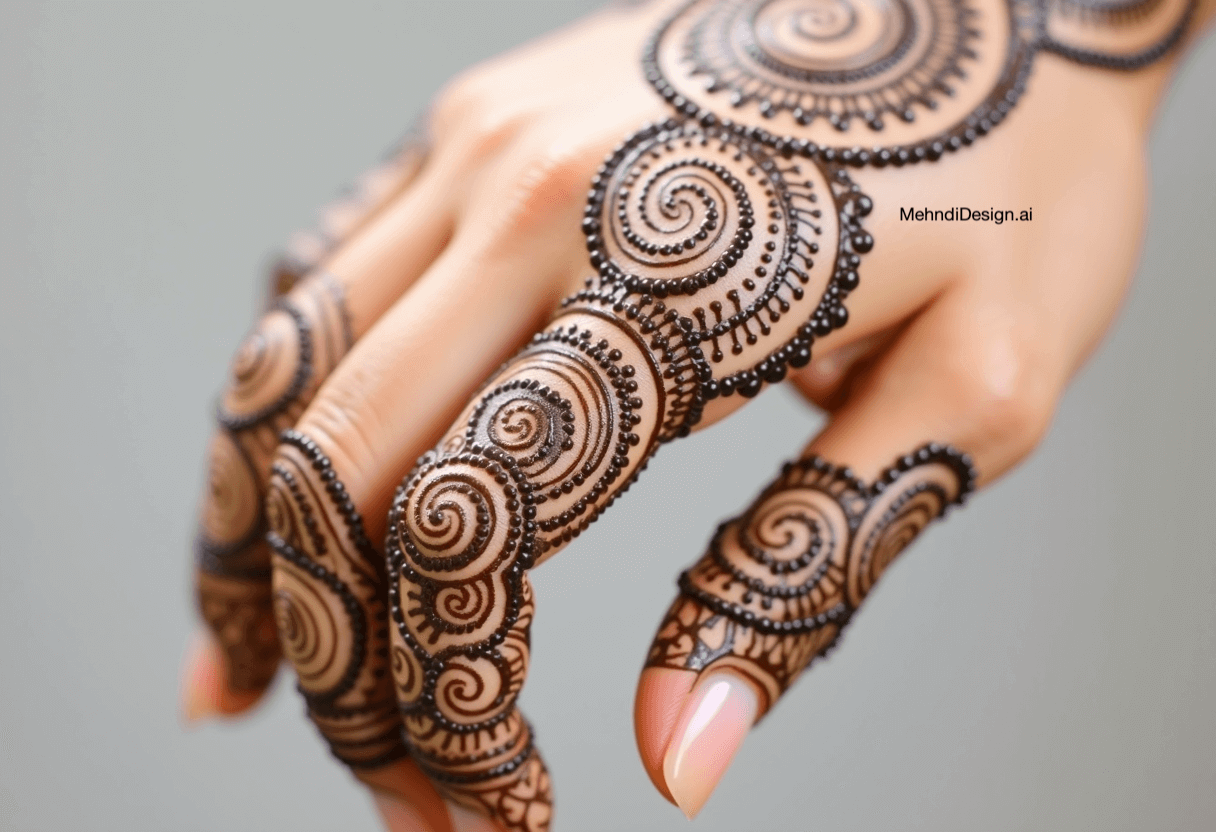
19. Spiral Lines
Spirals are easy to draw and can fill space effectively. They bring a sense of continuity and flow to your design.
How to Draw:
- Start with a small spiral in the center of your palm.
- Continue spiraling outward until you reach the desired size.
- You can add smaller spirals around the main one.
Tips:
- Keep the spacing between the lines consistent.
- Use smooth, steady movements for clean lines.
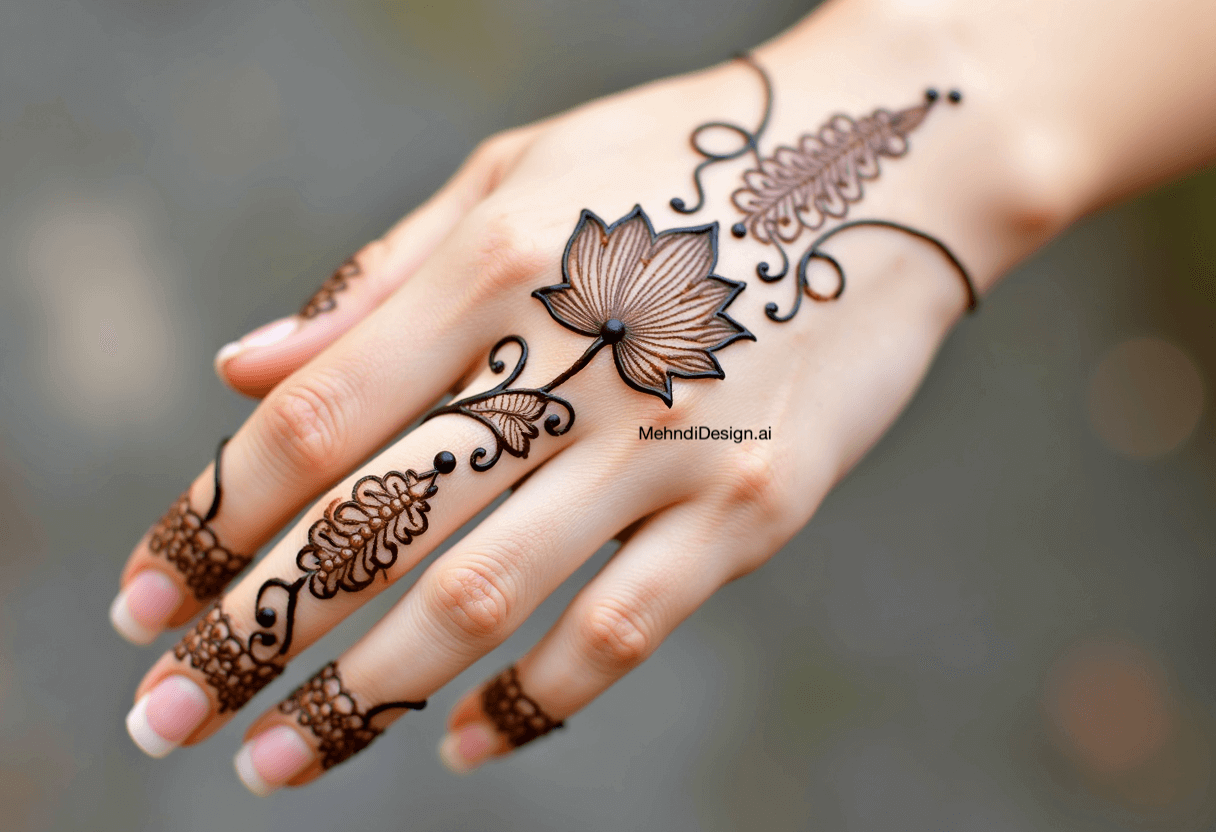
20. Simple Lotus
The lotus flower is a symbol of purity and enlightenment. A simple lotus design adds a spiritual touch to your mehndi.
How to Draw:
- Draw a small oval for the center of the lotus.
- Add petals around it, starting with larger ones at the bottom.
- Layer smaller petals on top.
Tips:
- Keep the petals symmetrical.
- You can add a few leaves at the base for extra detail.
21. Bracelet Style
This design mimics wearing multiple bracelets. It's stylish and covers the wrist area beautifully.
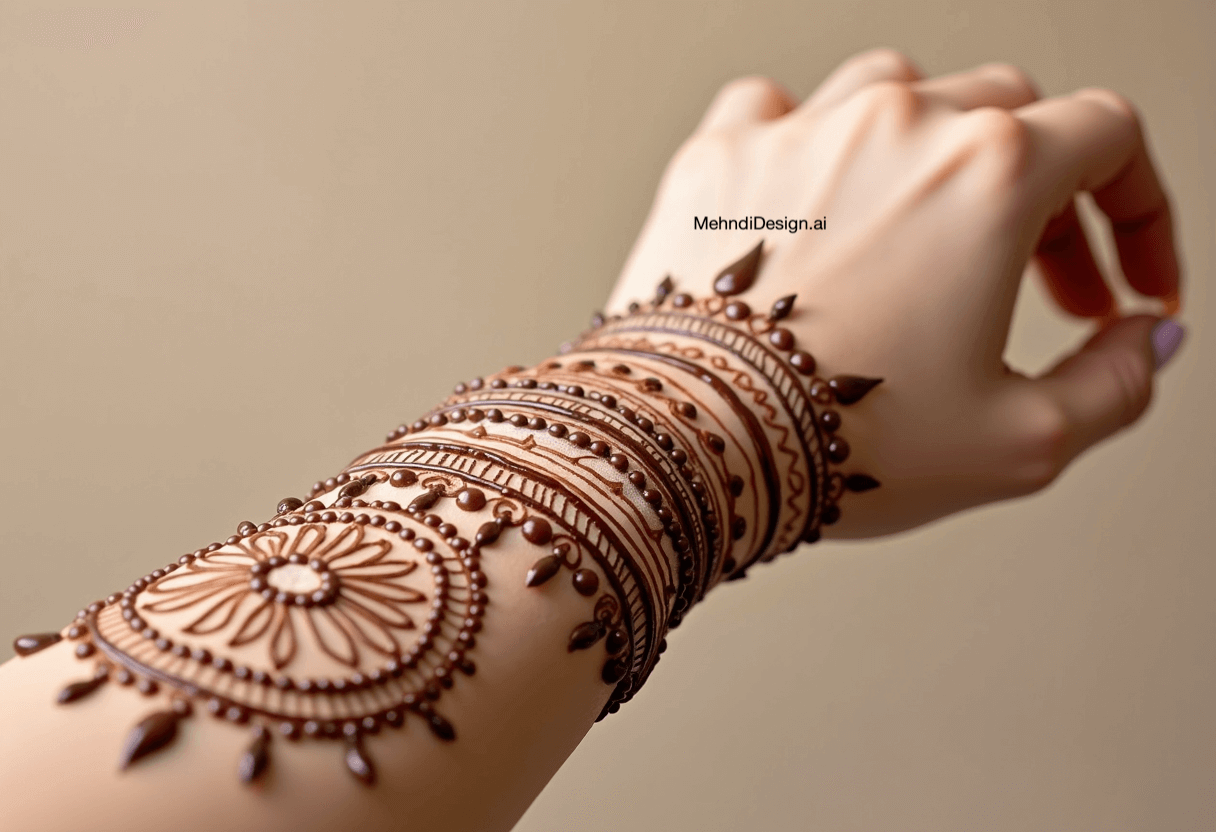
How to Draw:
- Draw several bands around your wrist, varying in thickness.
- Decorate each band with different patterns like dots, zigzags, or small flowers.
- Connect the bands with small chains or lines.
Tips:
- Use contrasting patterns for each band.
- Ensure the bands are evenly spaced.
22. Checkerboard Pattern
The checkerboard pattern is simple yet eye-catching. It adds a modern touch to traditional mehndi.
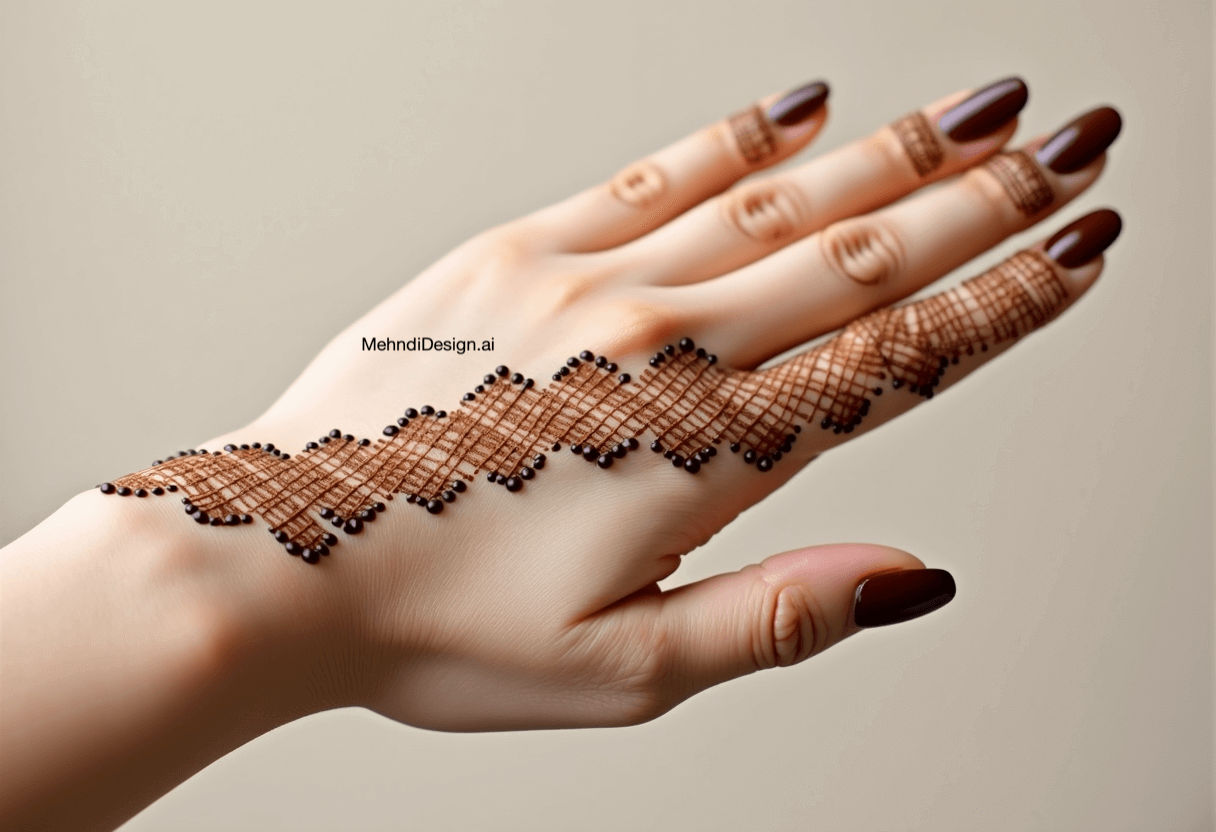
How to Draw:
- Draw a grid of squares in the area you want to cover.
- Fill in alternating squares to create the checkerboard effect.
- Keep the lines straight and the squares uniform.
Tips:
- Use thin lines to keep the design from looking too heavy.
- Practice on paper to perfect the grid.
23. Leafy Trails
Leaves connected in a trail bring a natural and graceful element to your design. It's simple to draw and looks elegant.
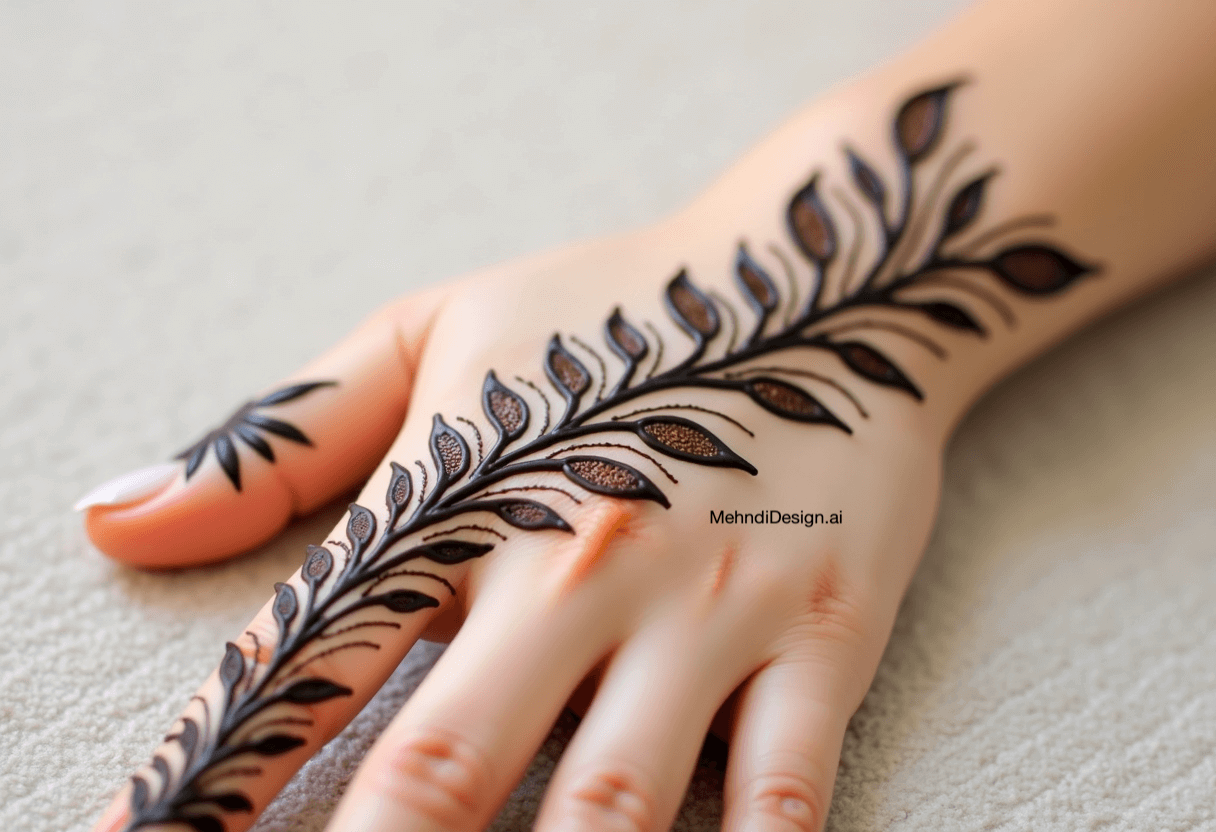
How to Draw:
- Draw a curved line starting from your wrist to your middle finger.
- Add leaves on alternating sides of the line.
- Keep the leaves small and uniform.
Tips:
- Follow the natural curve of your hand.
- You can add small flowers for extra detail.
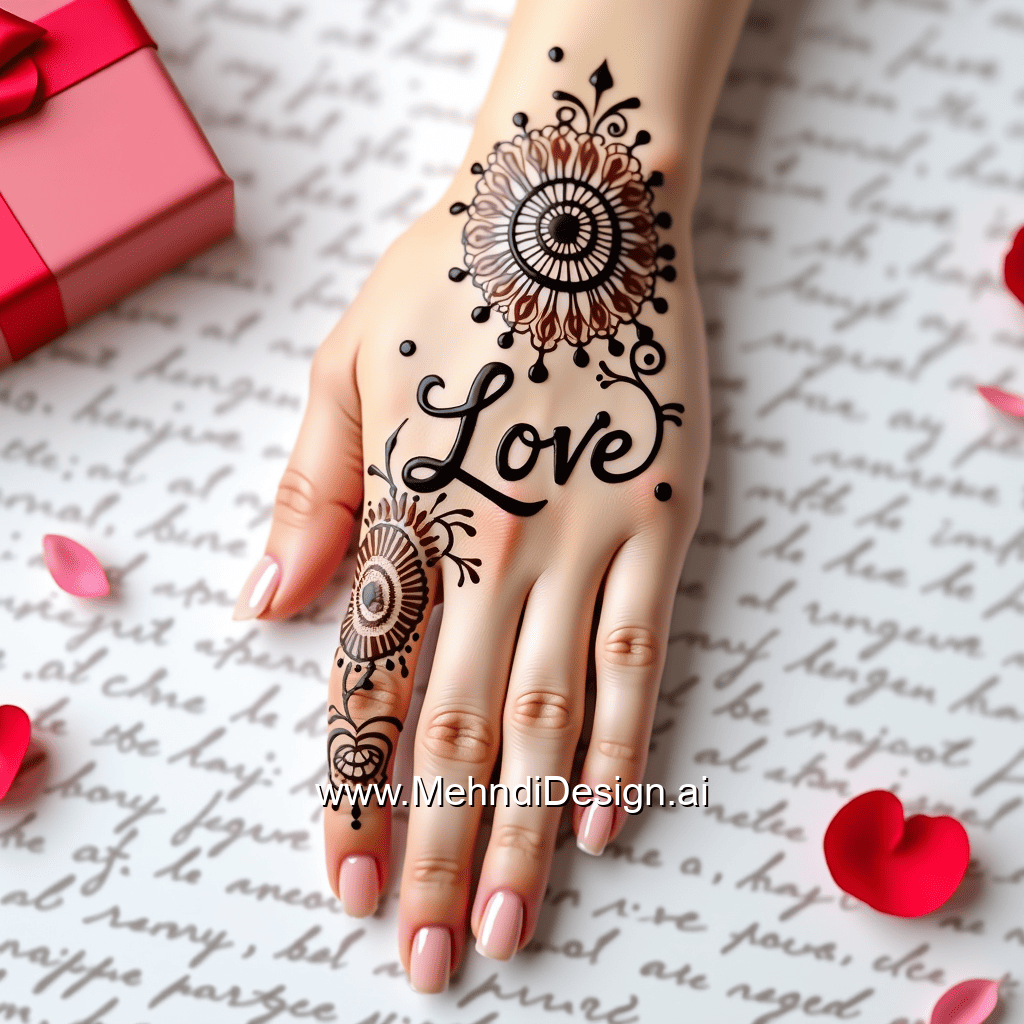
24. Name Initials
Personalizing your mehndi with your initials or those of a loved one adds a special touch. It's subtle and meaningful.
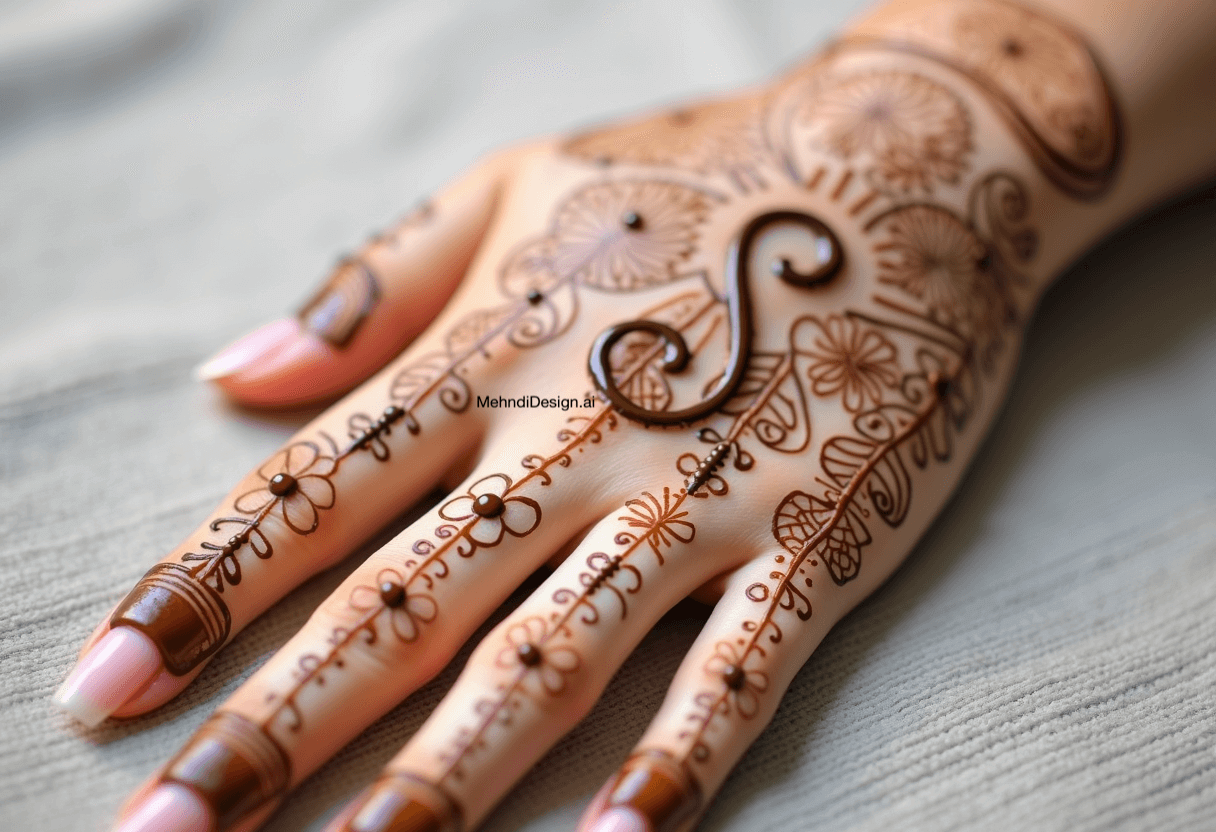
How to Draw:
- Choose an area on your hand, like the wrist or the side of a finger.
- Write the initials in a stylish font.
- Incorporate the letters into a simple design like a heart or flower.
Tips:
- Keep the initials small and neat.
- Use cursive or decorative lettering for elegance.
25. Minimalist Back Hand Design
Sometimes, simplicity speaks volumes. A tiny motif on the back of your hand can be incredibly chic and goes well with any outfit.
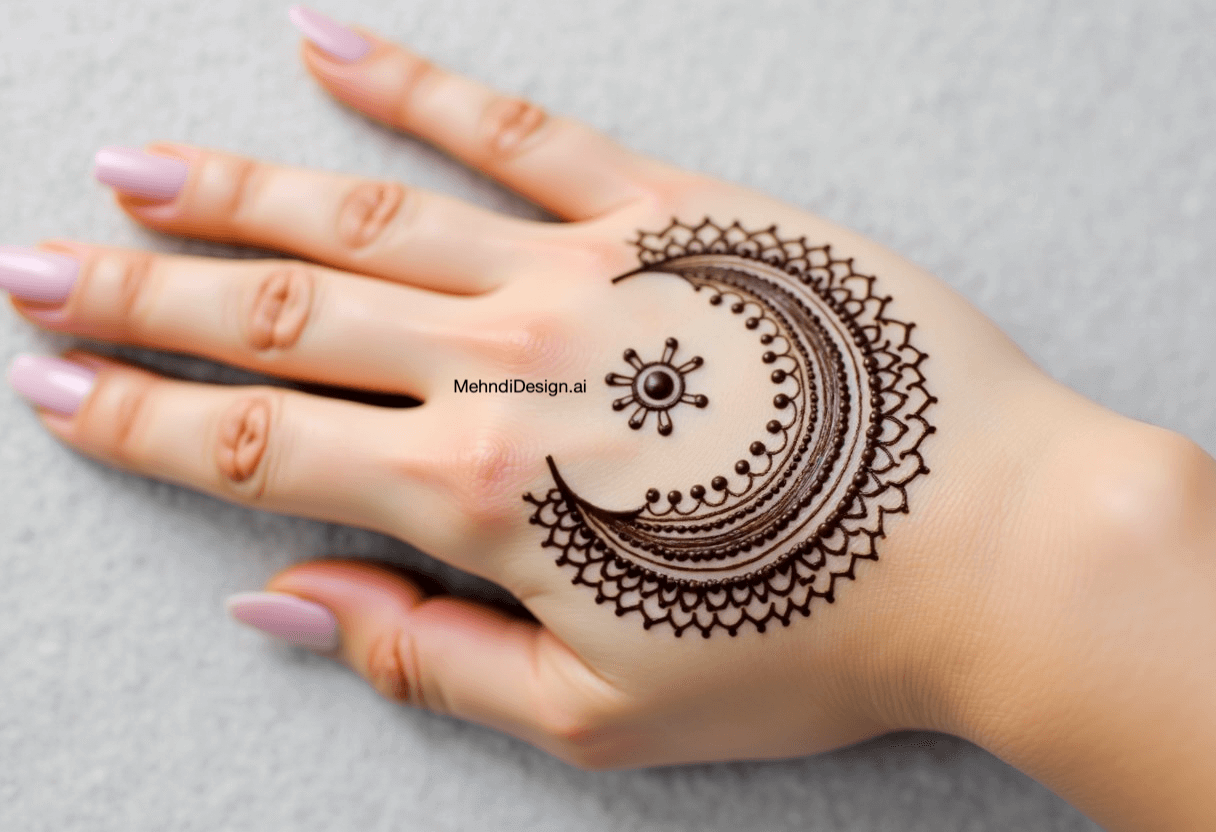
How to Draw:
- Choose a simple shape like a star, heart, or small flower.
- Place it in the center of the back of your hand.
- Add tiny dots around it if desired.
Tips:
- Keep the design centered for balance.
- Use minimal lines to maintain the minimalist aesthetic.
Conclusion
These 25 easy and stylish simple mehndi designs are perfect for anyone looking to adorn their hands without spending hours or needing professional skills. From floral patterns to geometric shapes, there's something for every style and occasion. Mehndi not only enhances your beauty but also allows you to express your creativity.
Tips for Applying Mehndi:
- Practice Makes Perfect: If you're new to mehndi, practice the designs on paper first.
- Quality Matters: Use good quality mehndi cones for smooth application and a rich color.
- Preparation: Clean your hands thoroughly before applying mehndi to ensure the best stain.
- Aftercare: Once the mehndi dries, avoid washing your hands immediately. Scrape off the dried mehndi and apply a mixture of lemon juice and sugar to deepen the color.
- Patience is Key: The longer you keep the mehndi on, the darker the stain will be.
FAQs
Q: How long does it take for mehndi to dry?
A: Mehndi typically takes about 20-30 minutes to dry on the skin's surface. However, for the best results and a deeper color, it's advisable to keep it on for at least 2-3 hours.
Q: How can I make my mehndi design last longer?
A: To prolong the life of your mehndi design, avoid washing the area with soap for the first 24 hours. Apply natural oils like coconut or mustard oil to moisturize the skin and protect the design.
Q: Are these designs suitable for both front and back hands?
A: Yes, all the designs mentioned can be applied to both the front and back of your hands. Feel free to mix and match designs to suit your preference.
Q: Can I use these designs for special occasions?
A: Absolutely! While these designs are simple, they are elegant enough for festivals, weddings, and other special events.
Q: Is it safe to use mehndi on sensitive skin?
A: Natural henna is generally safe for most skin types. However, always do a patch test if you have sensitive skin or allergies. Avoid black henna, which may contain harmful chemicals.
Add these designs to your mehndi collection, and you can enjoy henna art anytime. Perfect for special events or just to brighten your day, these simple mehndi designs will surely impress.
- simple mehndi design
- mehndi design 2024
- latest mehndi design



Leave a Reply
Your email address will not be published. Required fields are marked *